Image Source: Pixabay
Life’s an endless trip of discoveries, an infinite opportunity to know the people, culture, and breathtaking destinations living across different points of the globe.
It’s a traveler’s dream to explore these worldly opportunities, but it’s one thing to explore, encapsulate your travel memories through photos, and share the experiences to your fellow travelers on Instagram.
To capture the best moments of your travel experience, we’re sharing with you these 9 photography hacks to try during your photoshoot sessions!
1. Research your destinations ahead
Best way to take stunning photos of your travel destinations? Research and plan ahead. This helps you visualize the best photos to take for each place, and consider the lighting and angles of your photos.
You’ll want to check out the best photography spots in the places you’re visiting. Most travelers share these on their blogs and review sites like TripAdvisor, sometimes even providing a sample of their photos taken in those spots.
You’ll also want to research the times when the destination gets super crowded, and when do these tourists leave the place. This helps you plan your photography schedule so you can take shots with as little people in the picture as possible.
Researching helps you find photography spots, and help you identify the best times when the place is less crowded.
It’s also ideal to research the predicted weather of the destination in the days you’re visiting there, especially if you’re going to rely on natural lighting.
If there’s going to be rainy days ahead, take advantage of the gloomy weather for a dramatic effect. Otherwise, if you’re looking for sun-filled, cheerful photos of nature and landmarks, better hold your photo sessions until the sun shows signs of its presence.
There are plenty of apps available that can help you track the golden hour for each place. Some of the apps worth checking out are:
- Magic Hour App Store
- One App Store
- The Photographer’s Ephemeris App Store | Play Store
2. Use Google Maps’ Street View to further visualize your shots
Sometimes, you just have to see a place for yourself before you’re convinced of its beauty. Or perhaps you just need more materials to plan out your shots.
Whatever the case is, there’s one Google Maps feature proven to be handy for travel photographers: Street View. It “transports” you into a specific location by providing a real-time, interactive image of the place. Now you can easily which angles you’ll be working on during your photoshoot!

Take this Street View of Kalanggaman Island for example. You can already see some IG-worthy spots here!
3. Leave the tripod at home and just improvise a stand for your camera
Tripods take up a huge space in your luggage, and it’s kinda tedious to carry around, especially if you’re traveling places with long distances. So leave the bulky tripod at home.
But still, you need some tripod alternatives to keep your shots steady and sharp. In this case, you need to pull your creativity out!

Leave the tripod at home and improvise a stand for your camera.
Analyze your surroundings. What items could you possibly use as a stand for your camera or phone? For example, if you’re in a park, you can use the tables, trees, fences or rocks to keep your camera steady.
Or if you’re in the ocean, those huge cliffs could come in handy. You can build a sandcastle-type stand too.
And in places where there are only a few handy items or spots around, a sturdy backpack would be your ideal tripod here.
If you’re relying on your phone camera for your travel photos, a monopod would suffice as your phone stand. They’re lighter than tripods, and they take up little space in your luggage.
4. Place the sun in your backdrop
Having the sun at your or your subject’s back brings good lighting to your subject on the front side.
It also prevents your photo from having unwanted shadows and the need to make harsh adjustments just to balance the highlights and shadows of the photo.
Plus, you’ll have a vibrant glow to your photo, highlighting the blue skies and the sunkissed touch on your subjects. (See also: 5 Reasons Why Photography is Good for Health and Life)
5. Play around with your white balance
The white balance settings in your cameras, whether DSLRs or smartphone ones are usually set on automatic, which adjusts the tone of your image with AI settings.
Although that sounds cool, sometimes, it doesn’t adjust to how dramatic or cool/warm you want your photos to be. So if you want that extra effect to your photos, check out the white balance settings of your camera.
You can then play around with the white balance of your image by checking out the predefined white balance settings, or by sliding the dial according to the value you want. The lower the value, the “cooler” the photo will be.
6. Look for patterns and symmetry
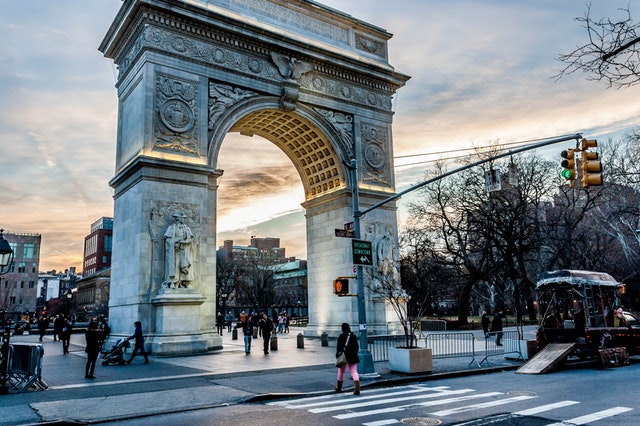
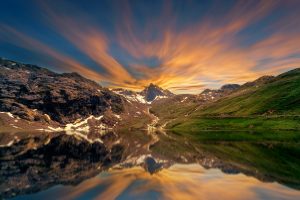
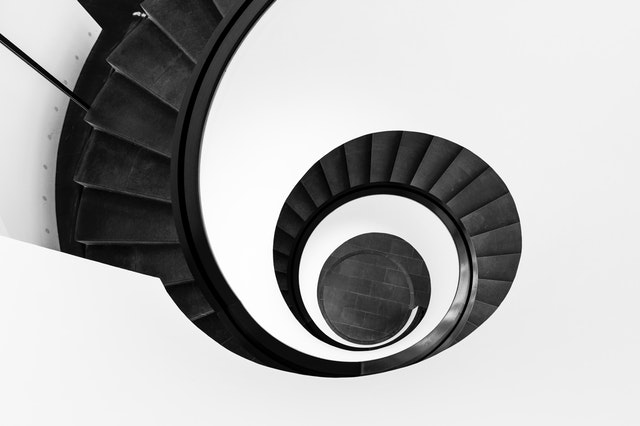
Patterns and symmetry add flair on your subject, providing more depth and story to your photos. Sometimes, these extras are the focus of other people’s travel photos, especially those that have a historical significance to the place you’re traveling to. And symmetry, in particular, adds a settling sense of balance to your photos.
They’re not hard to locate. They could be in nature, historical landmarks, even in your own reflection in the water. It only takes a creative eye and an out-of-the-box imagination to capture these patterns and symmetry to your camera.
Take these photos for example:
 |  |
7. Play around with lightings and angles
We normally take photos at an eye level, since it’s easier to visualize our subject at this angle. However, you could do more than sticking out with this angle (and even lighting), especially if you’re achieving a special vibe or tone for your shots.
Try exploring different angles, like a top view angle used in flat lay photography, placing the camera above your head for a heightened level, or an upside angle for a more entertaining and creative look.
You can also play with lighting sources of your photos. For example, placing your subject against the light will create a silhouette effect.
8. Batch edit your photos
Chances are, you’ve taken a lot of photos, and you’re keeping plenty of them in the editing process. Instead of taking time to edit each photo and apply filters and such manually, you can batch process them instead.
Photoshop and Lightroom allow you to do this, but there are other batch processing tools out there if you’re not familiar with this software, like PhotoScape, Fotor, and BatchPhoto.
For smartphone users, editing apps like Snapseed allow you to save the settings and adjustments you made with the first photo as your custom template.
9. Experiment with the mix of saturation and vibrancy during the editing process
Your photos are good, but they’re lacking that “X factor.” Or perhaps you find the subject still lacks some highlight or looking dull. Either the tone is too cool or warm, or the contrast is too low or high.
This is why the editing process is an important part of photography. A few slides in the saturation, contrast, vibrancy, or temperature settings can complete the look you’re achieving for.
Don’t be afraid to play around with these settings to achieve that magazine-worthy photo! Just remember to take it easy with the adjustments to maintain the authenticity of the shots. Otherwise, it may look like a digitally illustrated photo!
Tell the stories of your adventure the vivid way with these photography hacks!
Leave your IG followers in awe with scenic photos of breathtaking destinations you’ve wandered to!
But don’t let the technicalities of travel photography overwhelm you. At the end of the day, it’s still your wanderlust spirit and creativity that would lead you to freeze your travel moments the best way possible.
About The Author:
Madison is a content creator for MILK Books. If she’s not perusing mom blogs or writing for MILK, she spends her time making sure her 2 little “offsprings” don’t get into trouble.


