Along with crafting lash sets, it’s essential for lash artists to know how to take off eyelash extensions.
As our clients entrust us with their time, money, and appearance, it’s our duty as professional lash techs to remove eyelash extensions with the utmost care and skill.
This article will break down the best way to remove eyelash extensions and which lash products are a must for any lash extension appointment.
The Best Time To Remove Eyelash Extensions
Knowing when to remove eyelash extensions is the best way to perform safe extension removals. As lash artists, we all know that the growth cycle of natural lashes is between 6 to 8 weeks.
This means, that after 6 weeks, natural eyelashes experience shedding. Along with natural lashes, our clients also shed their lash extensions. The results are noticeable gaps along the lash line and semi-filled lash sets.
And so, the best time to remove or retouch eyelash extensions is sometime between 6 to 8 weeks.
Make sure you set up a removal session after your clients get their new eyelash extension sets. A great tip is to set up these sessions before your clients leave your salon.
This can guarantee that your clients will have complete and full lash fills even after their natural lashes begin to shed!
Lash Removal Tools & Must Haves
Now that we know the proper time for extension removal, let’s also discuss the tools and products we must have on hand.
Browsing through lash supply stores and stocking up on your lash removal tools can help you be prepared for any lash appointment for weeks on end.
Eyelash Extension Remover
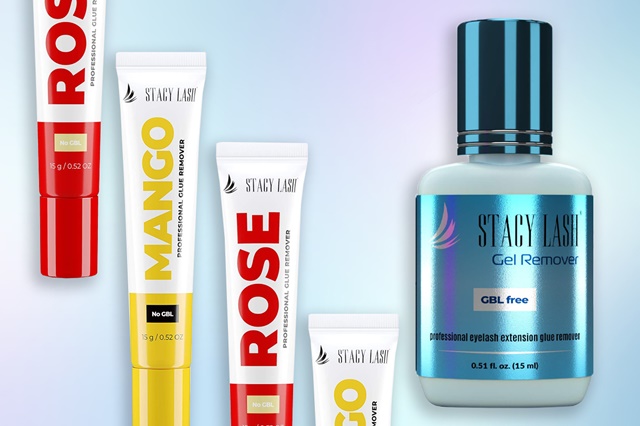
These liquid-based products can come in a variety of formulas, textures, and packaging. As lash artists, it’s always a good idea to have multiple eyelash extension removers available in the salon, as our clients may have different needs.
The most popular eyelash extension removers are gel and cream-based remover formulas. Both of these products can dissolve powerful lash bonds and break down the cyanoacrylate found in lash extension glues.
The main differences between gel and cream-based removers are usually their texture, consistency, and packaging. Gel removers have super active powerful formulas and are better for experienced lash artists.
These removers tend to be odorless with smaller packaging. If you want to invest in a high-quality gel eyelash extension remover, visit the Stacy Lash lash supply store!
Cream removers are also effective products. They prevent leakage of product into the eyes and are safer to use. Cream removers can have pleasant scents and come in larger packaging.
Visit the Stacy Lash lash supply store to get your hands on the mango and rose-scented cream eyelash extension removers!
Eyelash Pads & Mascara Wands
Along with professional eyelash extension removers, it’s also important to have eyelash pads and clean mascara wands during removal sessions.
Eyelash extension pads are adhesive eye patches that protect the delicate under-eye skin from irritation. These pads ensure that our clients are comfortable during their removal sessions.
Clean mascara wands are also essential lash products, as they help remove eyelash extensions with precision and ease.
Lastly, have a pair of lash tweezers by your side for easier lash separation and detachment.
How To Take Off Eyelash Extensions

Photo Credit: Unsplash
We have covered the basics of eyelash extensions, the best time to remove old lash fills and which lash removal tools we need, let’s explore how to take off eyelash extensions.
Step 1: Place Lash Pads
Let’s begin by placing the eyelash pads on our clients and making sure the skin is protected from any formula contact. Remove the thin layer on the back and attach the pad right underneath the lower lash line for optimal comfort.
Step 2: Apply Eyelash Extension Remover

Up next, it’s time to dissolve the cyanoacrylate bonds. Start by dipping your clean mascara wands into the remover of your choice. Then, slowly begin to apply the remover to the lash extensions. Take your time and make sure every lash is coated with the product.
Step 3: Remove With Tweezers
After 3-5 minutes, you can begin to remove eyelash extensions using your lash tweezers. One by one, gently separate the natural lashes from the mink extensions and remove the extensions using sliding motions. Perform this step on the entire lash line. Your clients should be lash extension-free after 15 minutes.
Step 4: Clean Up
The best way to remove eyelash extensions is to clean up the eye area after the detachment process. Dip a clean cotton pad in micellar water, and lightly slide the pad across the upper lash line. This step will remove any excess product or glue residue.
Step 5: Next Appointment
And lastly, let’s not forget to set up the next lash appointments with our clients! Look over your lash schedule and try to pick a date that works best for your workflow and can accommodate the growth cycle of your client’s natural lashes!
About The Author:
Stacey Smith is a freelance health writer. She is passionate about writing about women’s health, dental health, diabetes, endocrinology, and nutrition and provides in-depth features on the latest in health news for medical clinics and health magazines.


