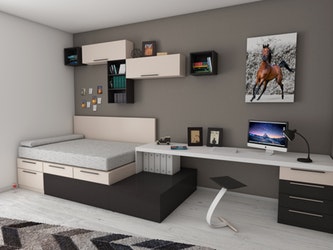
(Source: Pexels)
When the holiday season has come to pass and you’re running short of space, you might experience trouble storing all of your festive decorations for the rest of the year. But it doesn’t have to be so bad as you can repurpose those decorations and one of the best ways to do that is by decorating them with string lights.
String lights can give any dark corner a warm glow or even replace candles to set the atmosphere just right. If you’re looking for some cool and creative ways to set your string lights up, then take your pick from any of these:
1. DIY Headboard with LEDs
Mood lights are a staple for bringing that romantic ambiance to a bedroom. And that’s why we recommend putting them into a headboard. The best part about it is that you can make it as big as you like and then paint it to match your decor.
Here is what you can do to make this happen:
- Make a simple wooden frame from 2x4s and include some crossbeams.
- Drill some tiny holes into the bottom of each opening to put cords through.
- Paint your frame to match your decor and then screw it to your bedroom wall.
- Fill every space with lights and connect all of the cords.
- Cut out translucent panels from a polycarbonate sheet and then fix the frame with screws.
2. Illuminated Constellation Wall Art
Now you can turn your favorite zodiac sign or constellation and transform it into modern art.
Instructions
- Cut 1×2 birch or pine trim to size and cut the ends at 45-degree angles on the miter saw. When all of the pieces have been mitered, use picture nails to attach them alongside the perimeter of the plywood. The back of your plywood must sit flush with the back of the trim. The trim’s front must sit proud of the plywood, which leads to a lip around the front.
- Apply a coat of stain to the plywood with a rag and trim. Then, let it dry
- Use white semi-gloss paint and a small detail paintbrush to make your constellations. You can do this random and freehand or do it using the exact reference to an actual star chart. Next, create some holes directly through the painted dots with a ¼ inch drill bit.
- Clean wood shavings from the plywood’s surface and then add some sealer coat with a paint roller.
- While the plywood is upside down, push each of the terrible lights through the drilled holes. After filling all of the holes, fasten the ends of the twinkle light cords with electrical tape to the back of the plywood. Lastly, hang the constellation art to your wall and then plug in the lights.
3. 3-Minute DIY Nursery Lights
When your baby is sound asleep but you forget to put an essential item in their room and realized you have no nightlight, you throw a silent ‘darn it’ in the air. But instead of buying one for your kid, you can easily create a makeshift night light of your own.
Materials
- LED tea lights
- Translucent scrapbook paper or vellum
- Rubber stamp (optional)
- Transparent tape
Instructions
- Roll your paper until you decide on the size you wish to trim
- If you prefer using a rubber stamp, then stamp the paper first
- Roll the paper and then close it with tape
- Turn an LED tea light on and then place the rolled paper over it and you’re good to go.
About The Author:
Juliana Harkavy Sociologist of race & education at the University of Minnesota. Writer, audio book narrator, and funny story junkie. Owner of 3 dogs – Coda, Brownie, Jaden.


